In This Topic
Visual C++ with MFC
In This Topic
Overview
Here we provide you with step by step process how to start using GdPicture.NET with Visual C++ (up to VS 2017) with MFC environment.
Please follow these steps on how to successfully integrate GdPicture.NET in this environment. For better understanding, we demonstrate the steps on the attached snapshots below.
You can find the simple example of usage in the folder [INSTALLATION FOLDER]\Samples\WinForm\c++ mfc using com interop .
IntelliSense is fully supported in Visual C++
Integration
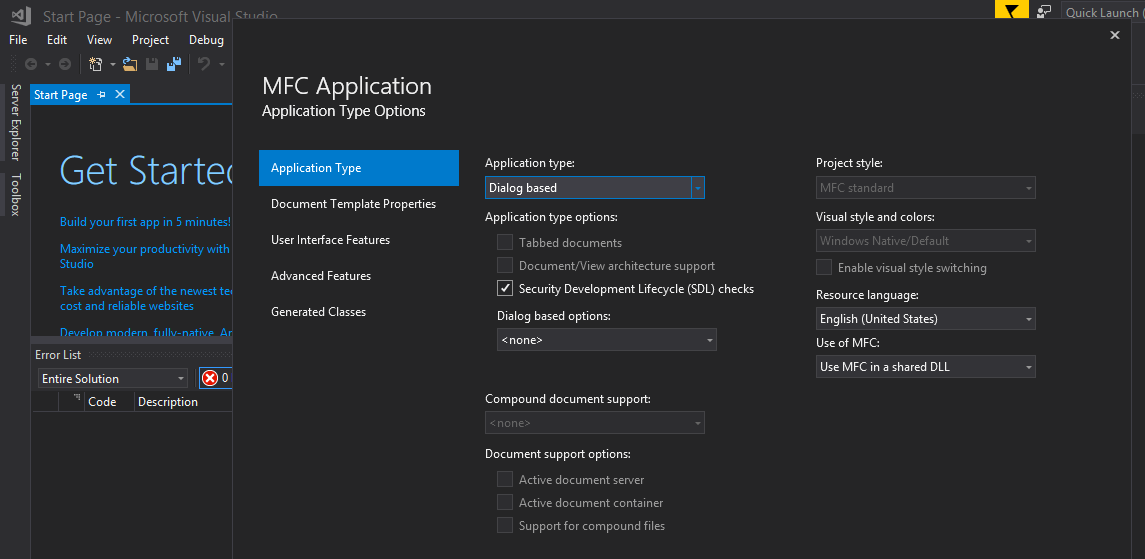
- Start a new project in Visual Studio ---> MFC/ATL ---> MFC application, set it as Dialog based application and copy (not required) GdPicture.NET.14.(64).dll and GdPicture.NET.14.tlb into your application folder.
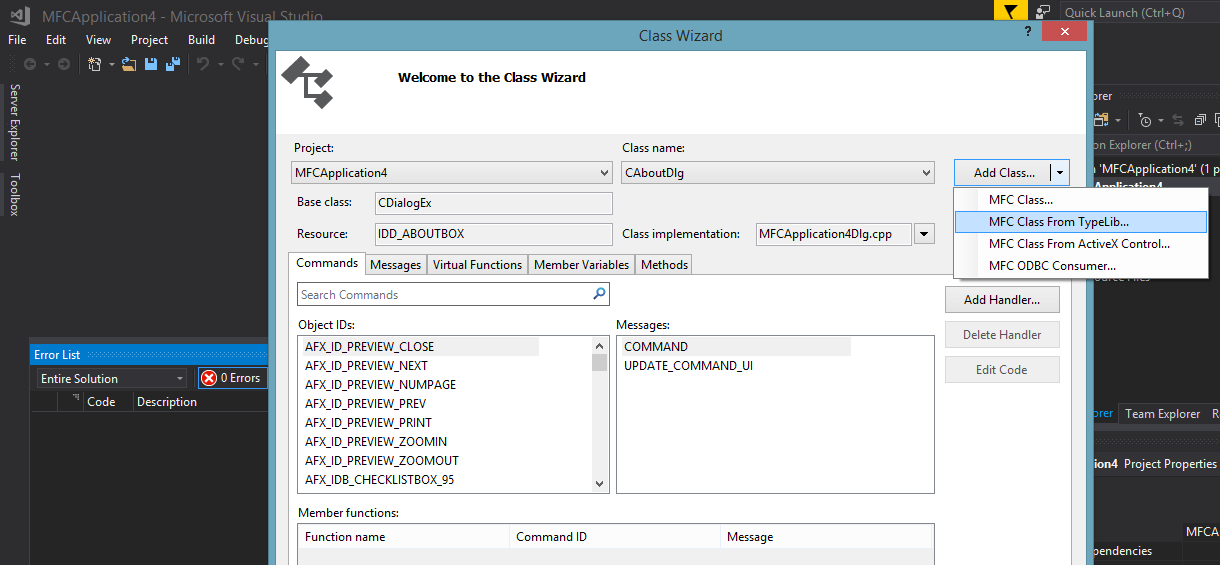
- To import the dll use Project/Class Wizard (available until VS 2017) and select the "Add Class" dropdown and then "MFC Class From TypeLib" item.
- Select "Add class from File" in the Wizard dialog and click the "..." button to navigate to select GdPicture.NET.14.tlb file located in [INSTALLDIR]/Redist/COM Interop or in your application directory if you have copied it. Select the interfaces you need from the list to generate the C++ wrappers.
- Be careful, each GdPicture class, which contains also events, will be splitted into two classes: One defining events and another one defining properties & methods. For example to import the GdPicturePDF class you should select "__GdPicturePDF" and "_GdPicturePDF".
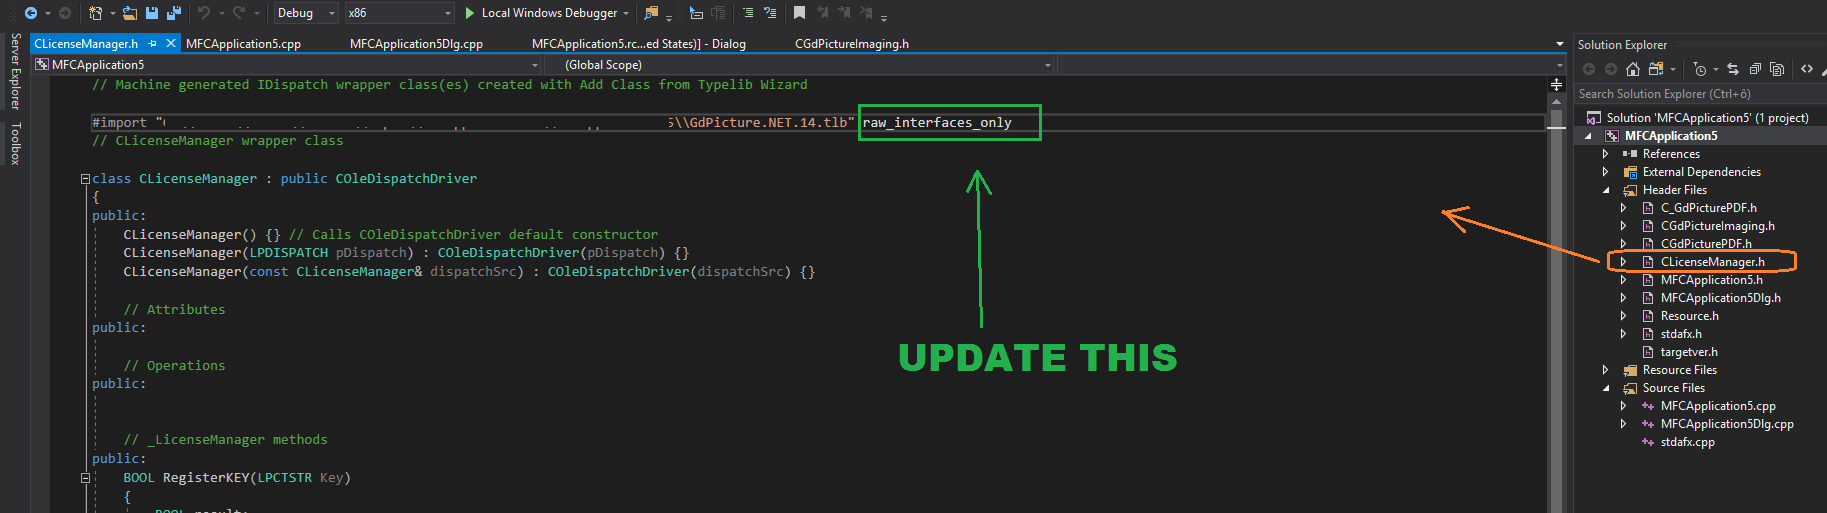
- Change the way how the dll is imported in generated header files (if needed) this way: no_namespace ---> raw_interfaces_only
- #import "\\...\\GdPicture.NET.14.tlb" no_namespace should be changed to "\\...\\GdPicture.NET.14.tlb" raw_interfaces_only
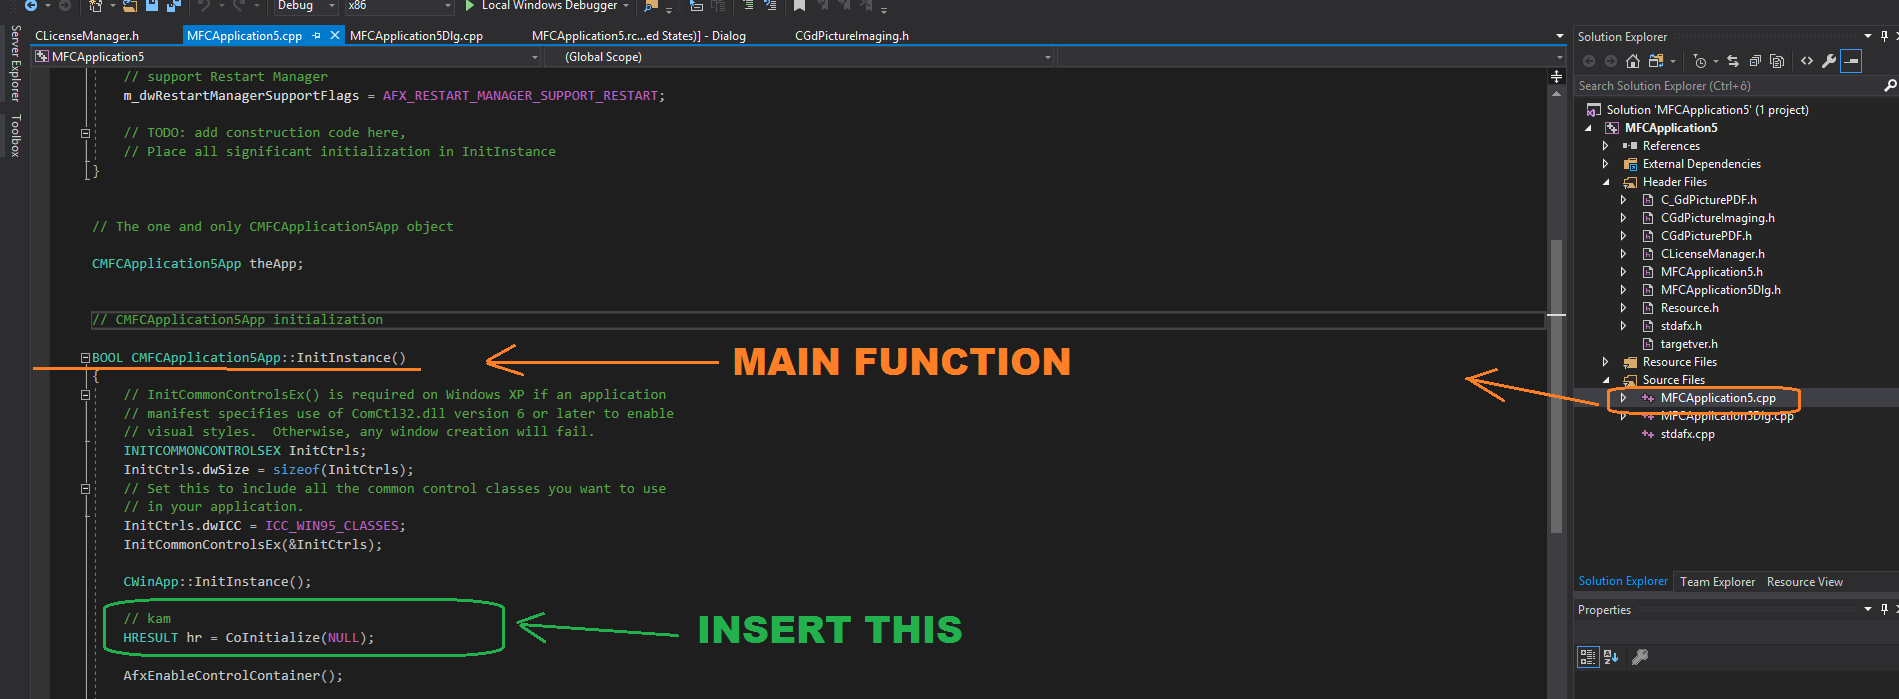
- Initialize COM objects in your application by adding this code line:
- HRESULT hr = CoInitialize(NULL);
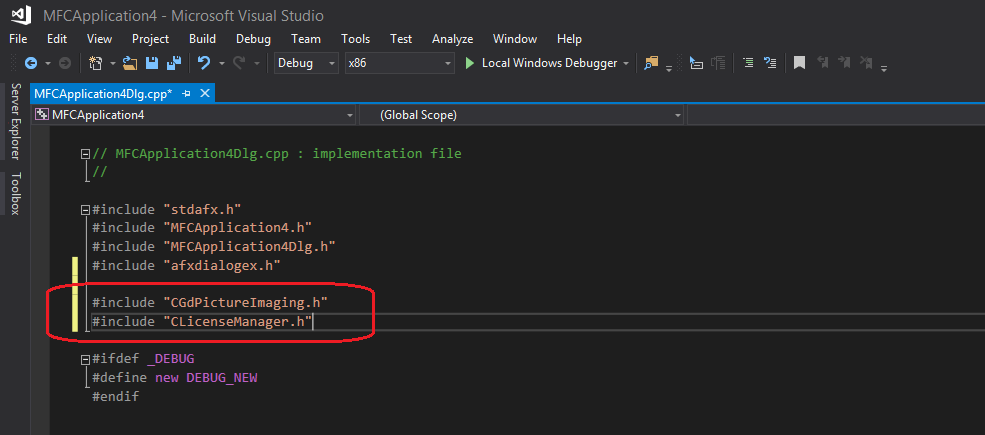
- Include generated headers into your files and build the application.
Start a new project.
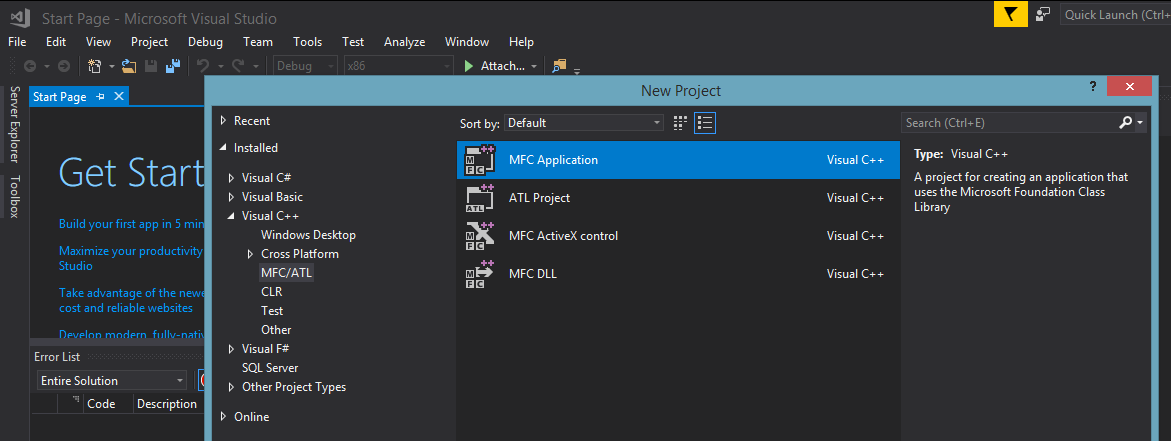
Set your MFC application as Dialog based.
Copy GdPicture.NET.14.dll and GdPicture.NET.14.tlb to your application folder.
Import the dll by selecting MFC Class From TypeLib using Class Wizard.
Select Add class from: File and navigate to select GdPicture.NET.14.tlb.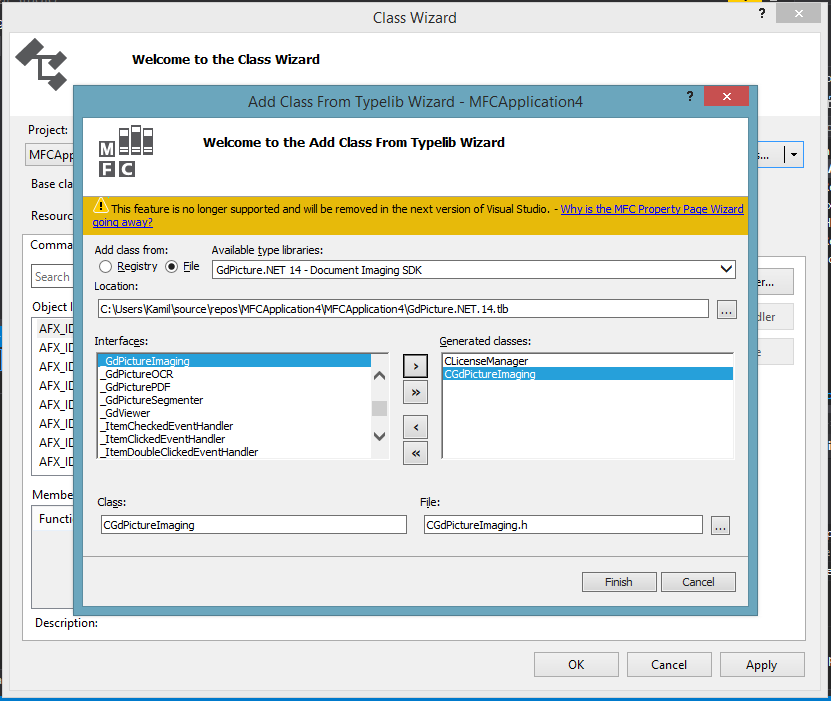
Select the interfaces you need from the list to generate the C++ wrappers.
Change no_namespace to raw_interfaces_only in #import code line in generated headers.
Initialize Com objects properly.
Include generated headers.
See Also